 Jessica
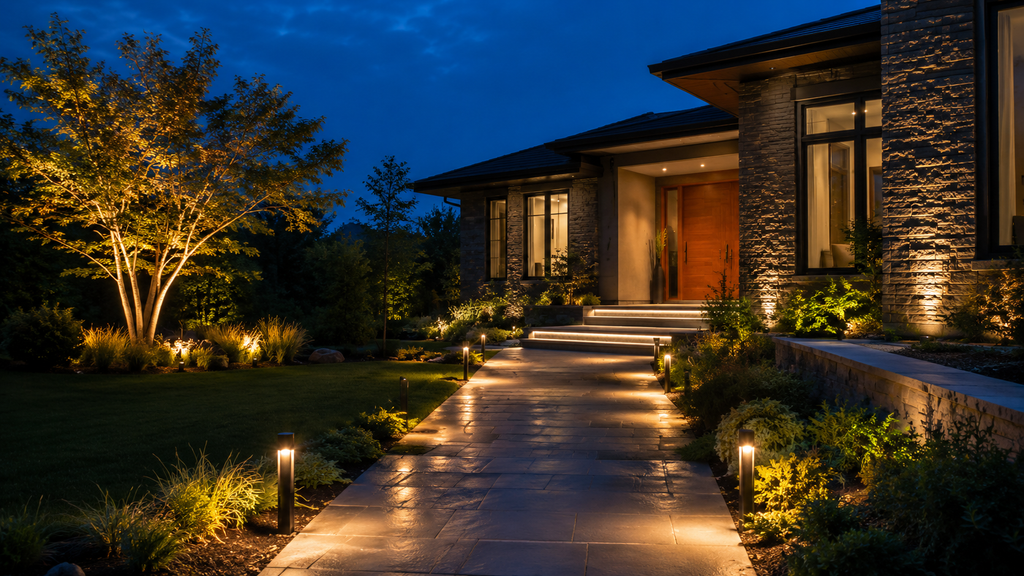
A good outdoor landscape lighting plan starts with understanding where light is needed and what it needs to accomplish. Before choosing fixtures, consider how people move through the property, which areas need safer visibility, which architectural or landscape features are worth highlighting, and where power is available. Planning first helps prevent glare, uneven lighting, poor fixture placement, and installation problems.
1. Decide What You Want Your Outdoor Lighting to Do
Start by defining the purpose of the lighting in each part of your property.
For safety, prioritize steps, walkways, driveway edges, uneven ground, and changes in elevation where better visibility can make nighttime movement easier.
For security, consider gates, garages, side entrances, back doors, and other access points. These locations may also benefit from motion sensors or dusk-to-dawn controls.
For curb appeal, identify architectural and landscape features worth highlighting, such as the façade, entrance, columns, stonework, mature trees, or textured walls.
For outdoor living, use softer illumination around patios, decks, dining areas, and seating spaces. Once you know what each area needs, choosing suitable fixtures becomes much easier.
2. Walk the Property After Dark and Identify Lighting Zones
Walk through the property after sunset to see conditions you may overlook during the day. Look for difficult steps, poorly visible walkways, dark entrances, driveway edges, and other places where additional light would improve visibility.
Also identify existing lights that cause glare and landscape or architectural features that could benefit from accent lighting.
Then divide the property into practical lighting zones, such as:
- front yard and entrance
- driveway and walkways
- patio or deck
- garden beds and trees
- side yard
- property perimeter
Thinking in zones prevents every part of the property from receiving the same type and amount of light.
3. Sketch a Simple Outdoor Lighting Layout
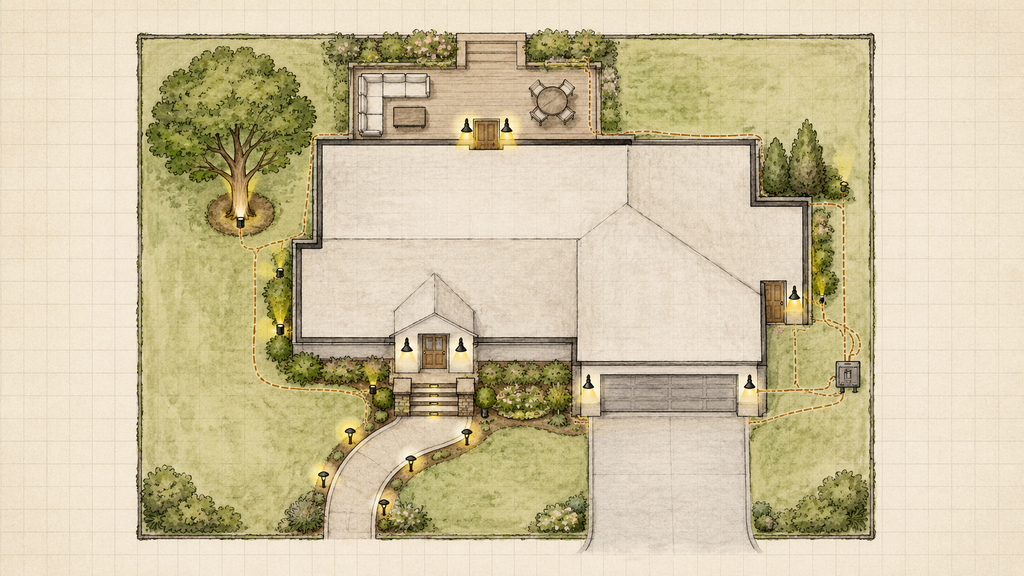
Make a simple property sketch before finalizing your fixture selections. It does not need to be technically detailed.
Mark the:
- house outline
- exterior doors
- garage
- driveway
- walkways and stairs
- patio or deck
- trees and garden beds
- exterior walls
- likely transformer or power-source location
Then mark the approximate location of each proposed fixture.
Seeing the complete layout makes it easier to identify overcrowded areas, missing coverage, mounting challenges, and potential cable routes. It can also prevent you from purchasing fixtures that are unsuitable for their intended locations.
4. Match the Right Fixture to Each Location
Choose the lighting effect you need first, then select a fixture capable of creating it.
Path lights provide low-level illumination along walkways, garden paths, and driveway edges.
Spotlights and uplights work well for highlighting trees, columns, façades, and architectural details.
Wash lights spread illumination across walls, hedges, and larger surfaces.
Step and deck lights can improve visibility around stairs, deck edges, and changes in elevation.
Exterior wall lights are useful around entrances, garages, patios, and exterior walls.
Floodlights provide broader illumination for security and utility areas, but their higher output means positioning and aiming require extra care.
Matching the fixture to a specific job creates a more balanced system than relying on one fixture type throughout the property.
5. Check Whether Exterior Landscape Wall Lights Can Be Mounted on Stone or Veneer
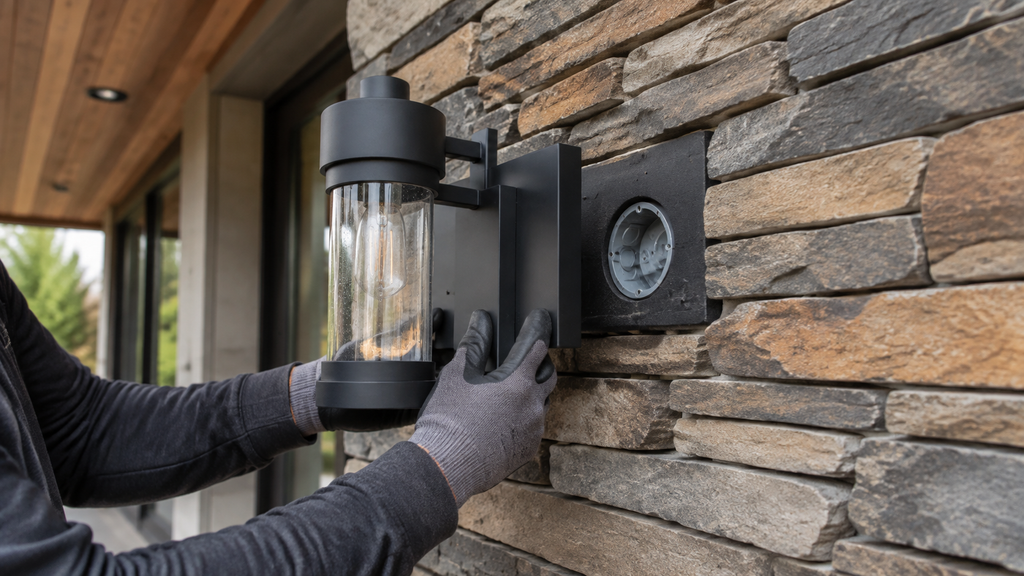
If you plan to install landscape exterior wall lights on natural stone, stone veneer, brick veneer, or uneven masonry, assess the mounting surface before selecting the fixture.
If you’re unsure how to mount wall lights on stone or veneer, consider consulting a qualified professional before purchasing to determine whether the mounting surface and wall assembly can properly support the fixture.
Before purchasing, check:
- the location of the electrical box
- fixture backplate dimensions
- whether the mounting area is sufficiently flat
- whether an appropriate mounting block or spacer is needed
- the underlying wall assembly
- manufacturer requirements for sealing and outdoor installation
Do not assume the decorative veneer itself provides the required mounting support. The fixture must be installed using the appropriate electrical box and supporting wall assembly.
6. Use Lighting Techniques to Create Depth Without Over Lighting
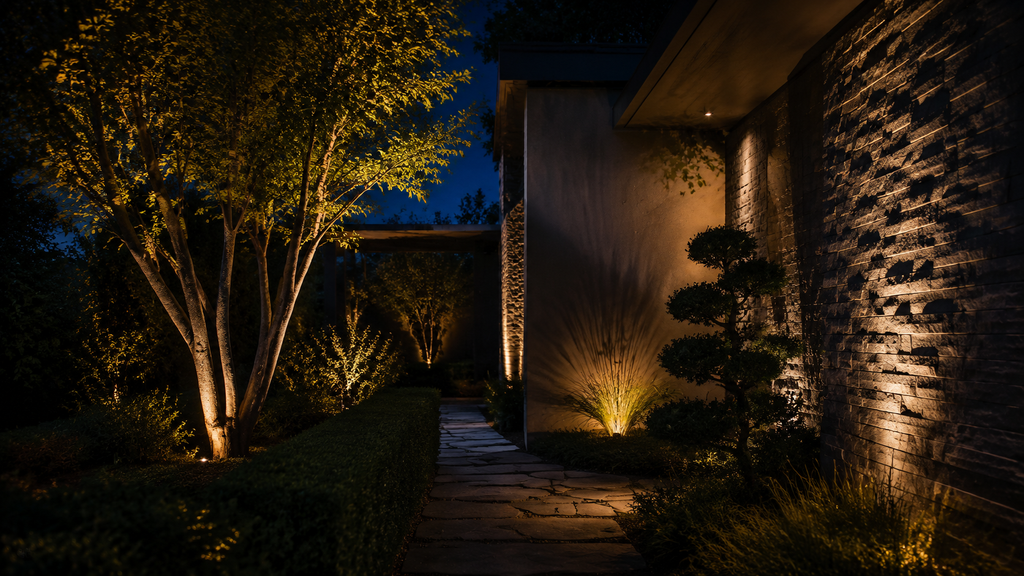
An attractive landscape does not need uniform brightness. Using different lighting directions creates contrast, depth, and visual hierarchy.
Uplighting can emphasize trees, columns, and architectural features.
Downlighting provides softer illumination from above and can imitate natural moonlight when used carefully.
Grazing positions light close to a surface to emphasize the texture of stone, brick, bark, or masonry.
Wall washing produces broader, more even illumination across a wall or hedge.
Silhouetting lights the surface behind an object to emphasize its outline, while shadowing uses projected shadows to create depth.
Leave some areas intentionally darker. Contrast helps illuminated features stand out and prevents the landscape from looking flat or over-lit.
7. Plan Spacing, Brightness, and Color Temperature Together
These three factors influence how comfortable and cohesive the finished landscape feels.
Spacing
Path lights should generally create separate, balanced pools of illumination rather than a continuous “runway” of evenly spaced bright points.
For some path-light designs, approximately 6 to15 feet apart can be a useful starting range. However, fixture height, lumen output, beam spread, surrounding surfaces, and manufacturer guidance should determine the final spacing. If one fixture clearly overlaps the next, consider adjusting spacing or output before simply adding more lights.
Brightness
Compare lumens and beam spread, not wattage alone. Lower output fixtures are often sufficient for pathways, garden beds, steps, and ambient areas. Higher output may be appropriate for tall trees, large architectural features, or security applications.
Color Temperature
For residential landscapes, 2700K to 3000K is a common starting range. 2700K creates a warmer appearance, while 3000K appears slightly cleaner and more neutral. Keeping nearby fixtures reasonably consistent helps the landscape feel intentional.
8. Control Glare and Keep Some Areas Dark
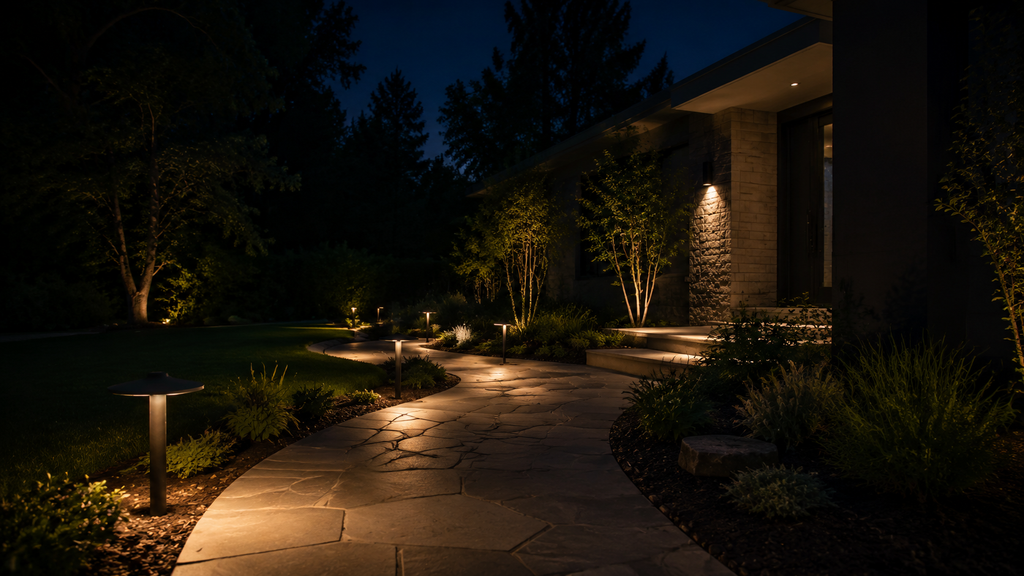
More light does not automatically create better visibility or a more attractive exterior. Good outdoor lighting principles focus on putting light where it is actually needed while limiting unnecessary glare, spill light, and upward illumination. Poorly positioned fixtures can shine directly into people’s eyes, windows, neighboring properties, or the street.
Avoid:
- exposed bare bulbs
- path lights aimed toward eye level
- floodlights directed at windows
- excessive upward light
- unnecessarily high output
Instead, use shielded fixtures, controlled beam angles, downward-facing light, careful aiming, and only as much output as the location requires.
9. Choose the Power System and Controls Before Buying Fixtures
The power system affects which fixtures you can use, so make this decision before purchasing the complete lighting setup.
Low-Voltage Lighting
Low-voltage systems are widely used for residential landscape lighting. A typical system uses compatible fixtures, low-voltage cable, and a transformer that converts the incoming supply to the required fixture voltage.
Check fixture voltage, transformer compatibility, total system load, cable requirements, and manufacturer specifications.
Line-Voltage Lighting
Some permanent exterior fixtures use line voltage. Because these systems involve household electrical supply, installation should follow applicable electrical requirements and manufacturer instructions.
Solar Lighting
Solar fixtures can be useful where running cable is impractical. Performance, however, depends on solar exposure, battery capacity, fixture quality, and seasonal conditions.
Controls
Consider timers, photocells, dusk-to-dawn controls, motion sensors, or smart controls based on how each lighting zone will be used.
For expandable low-voltage systems, allow reasonable transformer capacity for future fixtures rather than planning only for the initial load.
10. Test the Lighting at Night Before Final Installation
Once fixture locations have been planned, evaluate the layout after dark whenever practical.
The earlier nighttime walk identified where lighting was needed. This step verifies whether the proposed lighting actually solves those problems.
Check:
- pathway visibility
- unintended dark gaps
- excessive brightness
- glare
- awkward shadows
- beam direction
- appearance from the street
- views from inside the home
Temporarily positioning fixtures or using a flashlight to approximate some lighting effects, can reveal problems before locations become permanent.
Common Outdoor Landscape Lighting Planning Mistakes
Some landscape lighting problems begin before installation. Common mistakes include:
- buying fixtures without considering the complete layout
- illuminating every area equally
- relying on only one fixture type
- placing path lights too close together
- using more brightness than the location requires
- ignoring glare and spill light
- mixing noticeably different color temperatures within the same view
- overlooking stone, veneer, or other mounting surfaces
Conclusion
A successful outdoor landscape lighting plan starts with how your property is actually used. Identify priority zones, match fixtures to specific purposes, consider mounting surfaces, control glare, choose a compatible power system, and test the layout after dark. Once the plan is clear, explore 7Pandas outdoor lights and exterior wall lights that match the locations, lighting effects, and practical requirements of your home. Read More at https://designmode24.co/